
Overview
I first discovered Guitar Hero when I was younger, and the game quickly became one of my favorite ways to pass the time. After many years, I decided to pick the game back up and was instantly hooked again. This time, I discovered Clone Hero, a free rhythm game that allowed me to play thousands of songs. I was so into it that I ended up playing exclusively on a keyboard for a long time. While the keyboard was comfortable and functional, it just didn’t deliver the same energy and immersion as playing with the original Guitar Hero controller.
As I played more, I encountered a few issues. For example, on some hardware—like my laptop—there were ghost keys: when I pressed down too many frets, the system wouldn’t register other frets, causing me to miss notes and preventing me from full comboing some songs. I could’ve easily bought a random Wii or Xbox Guitar Hero controller and connected it to my PC. However, I didn’t want to deal with third-party drivers or having to install random programs on my system. I wanted a simple, plug-and-play solution that would give me the best experience without the hassle.
So, I decided to modify my original Wii Guitar Hero controller, using an Arduino to enhance its functionality and add a bit of personal flair with RGB addressable lights. The goal was to create a controller that was both functional and uniquely mine.
Why I Did It
My journey back into the world of Guitar Hero, especially with Clone Hero, reignited a passion for the game that I hadn’t felt in years. While the keyboard was a convenient solution, it lacked the soul of the original guitar-shaped controller. The keyboard didn’t give me the same excitement or physical connection to the game. Plus, the frustrating issue of ghost keys—where pressing too many frets at once would cause notes to be missed—was a significant barrier to fully enjoying my sessions. I wanted a controller that could bring back the energy of the original game and solve the issues I was facing with the keyboard.
Instead of buying a random third-party controller and dealing with potential driver problems or compatibility issues, I decided to take matters into my own hands. I saw this as an opportunity to create a custom, plug-and-play solution that would give me exactly what I needed: a responsive, hassle-free controller with added personality. By modifying my original Wii Guitar Hero controller with an Arduino, I could bring the controller up to modern standards and add unique features like RGB lighting to make it stand out.
The project wasn’t just about fixing problems—it was about making something that was both functional and exciting to use, a controller that would feel like an extension of me.
The Beginning
The inspiration for this entire project started during a university course in my degree, where we were learning about custom game controllers. One of the tools we were introduced to was the Makey Makey board.
What is a Makey Makey Board?
A Makey Makey is a simple circuit board that allows you to connect everyday objects to a computer and use them as input devices. Essentially, it turns anything that can conduct electricity—such as fruits, playdough, or even the human body—into a controller. The Makey Makey acts as an interface between these objects and a computer, allowing you to create custom input devices for games or other software. It’s a fantastic way to explore creative electronics and build fun, interactive projects.
For my class project, I decided to build a cardboard Guitar Hero controller from scratch, inspired by the idea of using unconventional materials and exploring how game controllers are made. I thought it would be an interesting challenge to create a controller that was both functional and unique, using the Makey Makey board to bring it to life.
I began by purchasing some buttons from Amazon to serve as the frets, while the body and neck of the guitar were constructed entirely from cardboard. Instead of using traditional buttons for strumming, I came up with an innovative solution. I used two wires in parallel on the bridge of the guitar, where pressing them together would register as a strum. This was a creative way to simulate the action of strumming a real guitar, mimicking the way you would push down on guitar strings. The setup worked surprisingly well, and it felt much more like playing a real guitar than using traditional buttons for strumming.
This project was a huge learning experience, and it laid the foundation for what would eventually become my custom Guitar Hero controller modification. It gave me the confidence to dive deeper into the world of custom controllers and sparked the idea for further improvement and refinement.
Hardware and Software
Choosing the Right Hardware
While the Makey Makey board is a fantastic tool for simple projects, I quickly realized it wasn't the best option for this custom Guitar Hero controller. Though it’s user-friendly and inexpensive, the Makey Makey has its limitations. First, it’s relatively expensive for what it offers, especially considering it doesn't provide the flexibility to add additional features like RGB lighting. Plus, I wanted more control over the hardware, such as the ability to emulate a HID (Human Interface Device), essentially a keyboard, which would allow me to seamlessly interface with the game.
This is where I decided to switch gears and use an Arduino Nano instead. The Arduino Nano is perfect for this project because of its small form factor and powerful capabilities. Not only can it emulate a keyboard, which is essential for sending inputs to Clone Hero, but it also gives me the freedom to program additional features—like controlling RGB addressable LEDs—using its available pins.
The Controller: Old Meets New
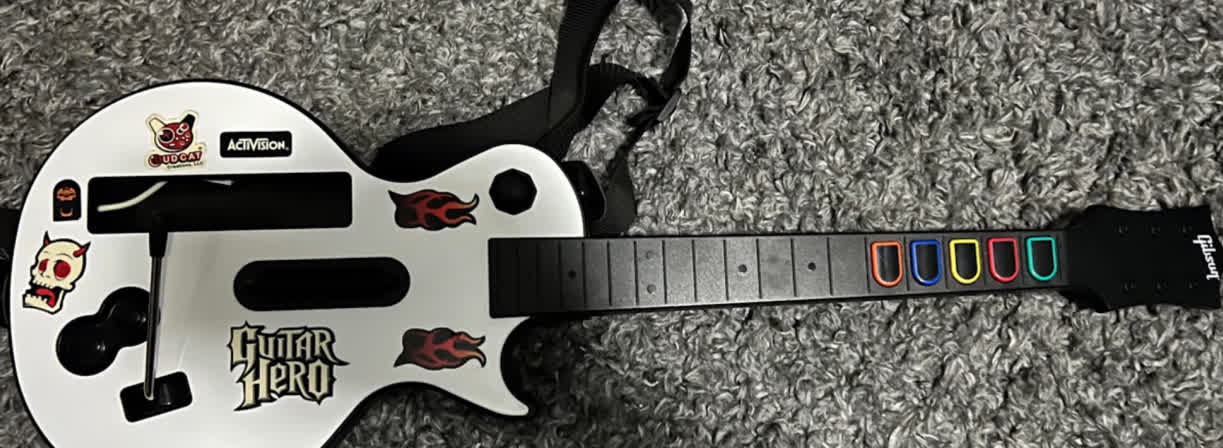
For the controller itself, I decided to repurpose an old Wii Guitar Hero controller that came with my copy of Guitar Hero 3: Legends of Rock—the very game that started my journey with Guitar Hero all those years ago. The Wii controller has a specific slot where a Wii remote is placed for it to work, so there wasn’t much that could be salvaged from inside the case. However, this presented a perfect opportunity to modify the controller and install new electronics.
Since the original setup was limited in terms of expandability, I carefully disassembled the Wii controller and began integrating the new components. I soldered the wires to the buttons and switches that would represent the frets, ensuring a solid connection. This gave me the input capabilities I needed for the game, all while maintaining the physical layout of the original Guitar Hero controller.
RGB Addressable Lights
One of the most exciting features of my custom controller is the addition of WS2811 RGB addressable lights. These LEDs are a fantastic way to add a visual element to the controller. I installed them in the space where the original Wii remote would go, adding a touch of modern flair while still keeping the nostalgic feel of the original design.
These RGB lights react to the frets I press, changing colors based on which fret is being held down. For example, if I press a particular fret, the corresponding LED will light up in a specific color. Even more exciting, when I strum or play certain notes, the lights will change dynamically, making the gameplay experience even more immersive.
Additionally, I added a neat touch where, when the power is turned on, all the LEDs light up in a rainbow pattern, signaling that the controller is ready to go. This feature isn’t just for show—it enhances the overall feel of the controller, making it more fun and visually engaging.
Software: Programming the Arduino
To make everything work, I programmed the Arduino Nano to emulate the keyboard input necessary for Clone Hero. This was done using Arduino IDE, where I wrote custom code to handle the button presses for each fret and the strum mechanism. I also used the Arduino’s pins to control the RGB lights, ensuring they would react appropriately based on which fret I was pressing or when I strummed.
The software communicates with the game by sending signals that match the keyboard inputs, which Clone Hero recognizes as fret presses. The RGB lighting is controlled by the Adafruit NeoPixel library, which makes it easy to control the colors and patterns of the LEDs based on the game state.
By combining the Arduino Nano, Wii controller, and RGB LEDs, I was able to create a truly custom experience that addressed the limitations of previous setups while adding a lot of personal flair.
What Can Be Improved: Further Integration with Clone Hero
While everything about my custom Guitar Hero controller works perfectly and meets my needs, there is one area I’d love to improve: the integration and reaction between the controller and the game, Clone Hero.
Current Functionality: Reaction to Frets and Missed Notes
As it stands, the controller reacts to its own internal inputs. The RGB lights light up whenever a fret is pressed, and they also react when I miss a note—essentially, they light up for any action involving the frets. While this provides a visual feedback loop, it doesn’t have the depth I’m looking for in terms of reacting to gameplay events in Clone Hero. For example, the lights don’t differentiate between hitting a note or missing it, and they don’t trigger special effects like when you activate Star Power or Overdrive in the game.
Desired Improvements: Interactive Lighting Effects
What I envision is a controller that only lights up when I successfully hit a note, creating a more immersive and rewarding visual effect. Additionally, I’d love to see special effects like dynamic lighting when activating Star Power or Overdrive—similar to how the original Guitar Hero controllers light up in reaction to in-game actions. This would create a more seamless integration between the gameplay and the controller, providing more interactive feedback.
The Challenge: Closed-Source Game Code
The main obstacle preventing this level of integration is that Clone Hero is closed source, even though it's built using Unity. If the source code were available, it would be much easier to create a custom library that sends serial data to the controller, directly communicating the state of the game (such as when a note is hit or Star Power is activated). With this setup, the controller could dynamically change its lighting effects based on the game's state, creating the exact type of interactive experience I’m aiming for.
A Potential Workaround: Image Recognition with Python
Although the lack of access to the game’s source code presents a challenge, I’ve thought of a potential workaround: writing a custom Python script that uses image recognition to detect the state of the game. By analyzing the game’s visuals (such as identifying when a note is hit or when Star Power is activated), the script could send serial data to the controller, which would then trigger the appropriate lighting effects.
This approach would require some fine-tuning and optimization, but it could be an effective solution to integrate the game’s state with the controller’s lights, creating a more immersive experience without needing access to the game’s source code.
Conclusion
Overall, this custom Guitar Hero controller project has been a rewarding journey that combined my love for rhythm games with my passion for DIY electronics. By modifying an old Wii Guitar Hero controller and incorporating an Arduino Nano, I was able to create a universal, plug-and-play controller that works seamlessly across multiple machines without the need for additional software. The integration of RGB addressable lights added a fun, immersive touch, reacting to the frets I press and creating a dynamic visual experience as I play.
While the controller works perfectly and meets my initial goals, there's still room for improvement in terms of integration with Clone Hero. Ideally, I’d like the lights to only react when a note is successfully hit and trigger special effects like Star Power. The biggest challenge here is the closed-source nature of Clone Hero, which limits my ability to directly communicate with the game’s code. However, I’m exploring potential workarounds, such as using image recognition through Python to send data to the controller and create a more interactive experience.
This project has not only given me a better, more personalized gaming experience but has also opened up new possibilities for future improvements. I'm excited to continue refining the design and integrating new features, and I hope this project inspires others to explore custom game controller modifications for themselves.
Additionally, working on this project rekindled my passion for guitar-like gameplay, and it ultimately pushed me to start learning the real guitar. The skills and creativity I developed while building this custom controller have sparked an interest in expanding my musical abilities beyond the virtual world, making this project even more meaningful.